Special Collections
Saxons and Vikings
Description: Books and images for project and them based learning about Saxons and Vikings
- Table View
- List View
Norman weapons (UEB Contracted)
byThis page has three images on it: a bow and arrow on the left, a flail at the bottom centre and a crossbow on the right. There is a locator dot shown, which will be at the top left of the page when the image is the right way up. The string of the bow is held under tension at the far left of the page. Halfway down the length of the string, the end of the arrow can be found with its fletchings (feathers), which stabilize its flight. The arrow extends to the right, passing over the handle of the bow and ending in a sharp pointed head. When the string is released, it throws the arrow forward with great force; it can travel for a distance of more than a kilometre. At the bottom centre of the page is a deadly flail. At the top of the image there is a loop with a chain hanging down from it. At the other end of the chain is a heavy metal spiked ball, at the bottom of the page. The handle of the flail is to the right of this and is used to swing the ball. It was a fearsome weapon that could pierce body armour but was not much favoured, as the sword was held in such high esteem.On the right of the page is a crossbow facing towards the top of the page. It is a small bow fixed to a stock (handle) and has a trigger (this cannot be seen in the diagram) that when pulled, releases the string and throws the bolt (small arrow) forward. The head of the bolt is at the top of the image and further down the bow extends to each side. Its taut string is fixed to each end and held in the middle of the stock, down from the fletchings (feathers) of the bolt. At the bottom of the page is the stock of the crossbow.
Norman weapons (Large Print)
byThis page has three images on it: a bow and arrow on the left, a flail at the bottom centre and a crossbow on the right. There is a locator dot shown, which will be at the top left of the page when the image is the right way up. The string of the bow is held under tension at the far left of the page. Halfway down the length of the string, the end of the arrow can be found with its fletchings (feathers), which stabilize its flight. The arrow extends to the right, passing over the handle of the bow and ending in a sharp pointed head. When the string is released, it throws the arrow forward with great force; it can travel for a distance of more than a kilometre. At the bottom centre of the page is a deadly flail. At the top of the image there is a loop with a chain hanging down from it. At the other end of the chain is a heavy metal spiked ball, at the bottom of the page. The handle of the flail is to the right of this and is used to swing the ball. It was a fearsome weapon that could pierce body armour but was not much favoured, as the sword was held in such high esteem.On the right of the page is a crossbow facing towards the top of the page. It is a small bow fixed to a stock (handle) and has a trigger (this cannot be seen in the diagram) that when pulled, releases the string and throws the bolt (small arrow) forward. The head of the bolt is at the top of the image and further down the bow extends to each side. Its taut string is fixed to each end and held in the middle of the stock, down from the fletchings (feathers) of the bolt. At the bottom of the page is the stock of the crossbow.
Norman Lord and Lady of the Manor (UEB Uncontracted)
byThis image shows a Norman Lord to the left of the page and a Norman Lady to the right. They are both facing forward so that all their facial features and limbs can be seen. There is a locator dot shown, which will be at the top left of the page when the image is the right way up. At the top left of the page is the Lord's head. He is wearing a floppy hat which hangs down to the left. Down the page are his fringe and his face, with an ear on either side. Down again, his cloak can be found draped over his shoulders and hanging behind him. He holds his arms out to either side of his body. Under his cloak he wears a long gown, which reaches to his boots at the bottom of the page. At waist level he is wearing a belt with a purse hanging down from it on the left.At the top right of the page is the Lady's head. She is wearing a small cap and down from this her face and ears can be found, with her long hair falling to either side and disappearing behind her back. Down the page she is wearing an ankle-length gown and holds her arms out to either side to show its full sleeves hanging down to calf-length. She wears a knotted cord, which is wrapped twice around her waist. At the bottom of the page are her feet, shod in leather shoes.
Norman Lord and Lady of the Manor (UEB Contracted)
byThis image shows a Norman Lord to the left of the page and a Norman Lady to the right. They are both facing forward so that all their facial features and limbs can be seen. There is a locator dot shown, which will be at the top left of the page when the image is the right way up. At the top left of the page is the Lord's head. He is wearing a floppy hat which hangs down to the left. Down the page are his fringe and his face, with an ear on either side. Down again, his cloak can be found draped over his shoulders and hanging behind him. He holds his arms out to either side of his body. Under his cloak he wears a long gown, which reaches to his boots at the bottom of the page. At waist level he is wearing a belt with a purse hanging down from it on the left.At the top right of the page is the Lady's head. She is wearing a small cap and down from this her face and ears can be found, with her long hair falling to either side and disappearing behind her back. Down the page she is wearing an ankle-length gown and holds her arms out to either side to show its full sleeves hanging down to calf-length. She wears a knotted cord, which is wrapped twice around her waist. At the bottom of the page are her feet, shod in leather shoes.
Norman Lord and Lady of the Manor (Large Print)
byThis image shows a Norman Lord to the left of the page and a Norman Lady to the right. They are both facing forward so that all their facial features and limbs can be seen. There is a locator dot shown, which will be at the top left of the page when the image is the right way up. At the top left of the page is the Lord's head. He is wearing a floppy hat which hangs down to the left. Down the page are his fringe and his face, with an ear on either side. Down again, his cloak can be found draped over his shoulders and hanging behind him. He holds his arms out to either side of his body. Under his cloak he wears a long gown, which reaches to his boots at the bottom of the page. At waist level he is wearing a belt with a purse hanging down from it on the left.At the top right of the page is the Lady's head. She is wearing a small cap and down from this her face and ears can be found, with her long hair falling to either side and disappearing behind her back. Down the page she is wearing an ankle-length gown and holds her arms out to either side to show its full sleeves hanging down to calf-length. She wears a knotted cord, which is wrapped twice around her waist. At the bottom of the page are her feet, shod in leather shoes.
Map of Britain showing Anglo-Saxon kingdoms in the Seventh Century (UEB Uncontracted)
byThis page shows a map of Britain on the left of the page, and a key to the abbreviations on the map in the top right of the page. A labelled north-pointing arrow is shown in the top left of the page. There is a locator dot shown, which will be at the top left of the page when the image is the right way up. The map shows seven different areas the Anglo-Saxons occupied in the Seventh Century and also indicates areas occupied by other tribes.
Map of Britain showing Anglo-Saxon kingdoms in the Seventh Century (UEB Contracted)
byThis page shows a map of Britain on the left of the page, and a key to the abbreviations on the map in the top right of the page. A labelled north-pointing arrow is shown in the top left of the page. There is a locator dot shown, which will be at the top left of the page when the image is the right way up. The map shows seven different areas the Anglo-Saxons occupied in the Seventh Century and also indicates areas occupied by other tribes.
Map of Britain showing Anglo-Saxon kingdoms in the Seventh Century (Large Print)
byThis page shows a map of Britain on the left of the page, and a key to the abbreviations on the map in the top right of the page. A labelled north-pointing arrow is shown in the top left of the page. There is a locator dot shown, which will be at the top left of the page when the image is the right way up. The map shows seven different areas the Anglo-Saxons occupied in the Seventh Century and also indicates areas occupied by other tribes.
Helmet found at Sutton Hoo (UEB Uncontracted)
byThis page shows front and side views of a richly decorated, seventh-century Anglo-Saxon parade helmet thought to have belonged to King Raedwald of East Anglia. It was found at a ship burial site at Sutton Hoo in Suffolk, England. There is a locator dot shown, which will be at the top left of the page when the image is the right way up. The front view of the helmet is at the top of the page and the side view at the bottom.There is a ridge on the front view, which runs vertically down from the top to two eyebrows. Down the page from these are two untextured eyeholes to see through, a nosepiece, a moustache and a mouth hole. To the left and right are an area of chain mail and two earflaps.The side view at the bottom of the page shows the ridge at the top curving down to the left and right. At the left is the chain mail panel to protect the wearer's neck and to the right of this is one of the earflaps. Further right is the face showing one eyebrow with an eyehole, nosepiece, moustache and mouth hole down the page.
Helmet found at Sutton Hoo (UEB Contracted)
byThis page shows front and side views of a richly decorated, seventh-century Anglo-Saxon parade helmet thought to have belonged to King Raedwald of East Anglia. It was found at a ship burial site at Sutton Hoo in Suffolk, England. There is a locator dot shown, which will be at the top left of the page when the image is the right way up. The front view of the helmet is at the top of the page and the side view at the bottom.There is a ridge on the front view, which runs vertically down from the top to two eyebrows. Down the page from these are two untextured eyeholes to see through, a nosepiece, a moustache and a mouth hole. To the left and right are an area of chain mail and two earflaps.The side view at the bottom of the page shows the ridge at the top curving down to the left and right. At the left is the chain mail panel to protect the wearer's neck and to the right of this is one of the earflaps. Further right is the face showing one eyebrow with an eyehole, nosepiece, moustache and mouth hole down the page.
My Revision Notes
by John WrightTarget success in Edexcel GCSE (9-1) History with this proven formula for effective, structured revision; key content coverage is combined with exam-style questions, revision tasks and practical tips to create a revision guide that students can rely on to review, strengthen and test their knowledge.With My Revision Notes, every student can:- Plan and manage a successful revision programme using the topic-by-topic planner- Enjoy an interactive approach to revision, with clear topic summaries that consolidate knowledge and related activities that put the content into context- Build, practise and enhance exam skills by progressing through activities set at different levels- Improve exam technique through exam-style questions and model answers with commentary from expert authors and teachers- Get exam ready with extra quick quizzes and answers to the activities available online
Anglo-saxon And Norman England, C.1060-88 (My Revision Notes Edexcel GCSE (9-1) History) (PDF)
by John WrightExam Board: Edexcel Level: GCSE Subject: History First Teaching: September 2016 First Exam: Summer 2018 Endorsed for Edexcel Target success in Edexcel GCSE (9-1) History with this proven formula for effective, structured revision; key content coverage is combined with exam-style questions, revision tasks and practical tips to create a revision guide that students can rely on to review, strengthen and test their knowledge. With My Revision Notes, every student can: - Plan and manage a successful revision programme using the topic-by-topic planner - Enjoy an interactive approach to revision, with clear topic summaries that consolidate knowledge and related activities that put the content into context - Build, practise and enhance exam skills by progressing through activities set at different levels - Improve exam technique through exam-style questions and model answers with commentary from expert authors and teachers - Get exam ready with extra quick quizzes and answers to the activities available online
Beowulf
by William CollinsHarperCollins is proud to present its incredible range of best-loved, essential classics.
GCSE History
by Aaron WilkesGCSE History is designed with a similar approach and methodology as the very successful Folens KS3 History series. The GCSE exam content is delivered through fun stories, entertaining material and unusual and interesting topics. Law and order in Roman times How savage were the Anglo-Saxons? Crime and punishment in the Middle Ages Tudors and Stuarts The Bloody Code Crime and punishment during the Industrial Revolution Power to the people, 1700-1920 Crime and punishment since 1900
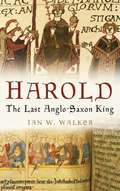
Harold
by Ian W WalkerKing Harold Godwineson (c.1022-66) is one of history's shadowy figures, known mainly for his defeat and death at the Battle of Hastings. His true status and achievements have been overshadowed by the events of October 1066 and by the bias imposed by the Norman victory. In truth, he deserves to be recalled as one of England's greatest rulers. Harold: The Last Anglo-Saxon King sets out to correct this distorted image by presenting Harold's life in its proper context, offering the first full-length critical study of his career in the years leading up to 1066. Ian Walker's carefully researched critique allows the reader to realistically assess the lives of both Harold and his rival William, significantly enhancing our knowledge of both.
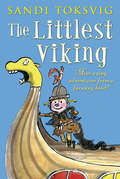
The Littlest Viking
by Sandi ToksvigWhen Amber, the littlest Viking, set out from Scandinavia to seek her fortune she must have got lost on her way! Now she's in Pegwell Bay with no one but her pet squirrel for company. When Katie, Gary and Joshua find her stranded on the beach, they decide to look after her. Now there's a Viking living in their garden!Having a Viking in the family isn't always easy. But when the garden is threatened by a nasty neighbour, Amber has some unusual - and hilarious - solutions to their problems . . .
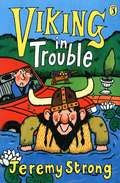
Viking in Trouble
by Jeremy Strong'Berserk?' repeated Mr Ellis. 'He's stark raving bonkers if you ask me!'Sigurd the Viking is back, and causing chaos wherever he goes. Even his new wife Mrs Tibblethwaite can't keep him out of trouble. But then, how would you react if you were a tenth-century Viking stuck in the twentieth century?
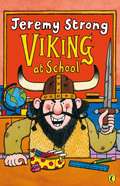
Viking at School
by Jeremy StrongSigurd, the Viking from the tenth century, is still stuck in the twentieth century. He lives with his friends the Ellis family in a seaside hotel and constantly causes chaos. When Tim and Zoe Ellis take him to school with them a series of seriously funny disasters results.
Staffordshire hoard sword pommel cap (UEB uncontracted)
by RnibThis page shows images of a pommel cap. There is a locator dot shown, which will be at the top left of the page when the image is the correct way up. There is a front view of a pommel cap in the bottom and centre of the page, a cap end profile in the top left of the page and a sword hilt in an image border to the right of the page. The decoration on the front view of the pommel cap shows a mass of intricate œworm shaped lines which interweave back and forth. The cap is slightly damaged on the bottom edge. The diagram on the right shows a sword hilt and the very top part of the sword blade at the bottom of the image. An arrow points to the pommel cap's position at the end of the sword and hilt. The cap is in a heavier line than the rest of the hilt. Down from the cap is the sword handle. The side view on the left shows the shape of the cap seen edge-on, which is seen from the direction of the arrow to the left. It is at a smaller scale to the front view. Eighty six pommel caps were found in the hoard. Most were gold and a few were silver. They had many different types of decoration.
Staffordshire hoard sword pommel cap (UEB contracted)
by RnibThis page shows images of a pommel cap. There is a locator dot shown, which will be at the top left of the page when the image is the correct way up. There is a front view of a pommel cap in the bottom and centre of the page, a cap end profile in the top left of the page and a sword hilt in an image border to the right of the page. The decoration on the front view of the pommel cap shows a mass of intricate œworm shaped lines which interweave back and forth. The cap is slightly damaged on the bottom edge. The diagram on the right shows a sword hilt and the very top part of the sword blade at the bottom of the image. An arrow points to the pommel cap's position at the end of the sword and hilt. The cap is in a heavier line than the rest of the hilt. Down from the cap is the sword handle. The side view on the left shows the shape of the cap seen edge-on, which is seen from the direction of the arrow to the left. It is at a smaller scale to the front view. Eighty six pommel caps were found in the hoard. Most were gold and a few were silver. They had many different types of decoration.
Staffordshire hoard sword pommel cap (large print)
by RnibThis page shows images of a pommel cap. There is a locator dot shown, which will be at the top left of the page when the image is the correct way up. There is a front view of a pommel cap in the bottom and centre of the page, a cap end profile in the top left of the page and a sword hilt in an image border to the right of the page. The decoration on the front view of the pommel cap shows a mass of intricate œworm shaped lines which interweave back and forth. The cap is slightly damaged on the bottom edge. The diagram on the right shows a sword hilt and the very top part of the sword blade at the bottom of the image. An arrow points to the pommel cap's position at the end of the sword and hilt. The cap is in a heavier line than the rest of the hilt. Down from the cap is the sword handle. The side view on the left shows the shape of the cap seen edge-on, which is seen from the direction of the arrow to the left. It is at a smaller scale to the front view. Eighty six pommel caps were found in the hoard. Most were gold and a few were silver. They had many different types of decoration.
Staffordshire hoard sword hilt plate (UEB uncontracted)
by RnibThis page shows an image of a hilt plate, detail of decoration, and a hilt. There is a locator dot shown, which will be at the top left of the page when the image is the correct way up. There is a face view of a hilt plate in the top of the page, a detail in an image border at the bottom of the page and a sword hilt in an image border in the bottom right of the page. The face view shows the plate to be slightly bent and some of the decoration is not shown as it is hidden by soil which has not yet been removed. At each end to the left and right is dashed line circle. These are the clasps to semi-precious stones which are missing. In the centre of the image is the hole where the blade would pass when the sword was being assembled. Around the hole there are intertwined animals. The detail shows the animals more clearly. On the left is the hind quarters of an animal. Its back leg is being grasped by the next animal which has one eye showing on its head. Its body curves down and then up again. Down from the head is the front foot with three toes. The leg goes to the right and then up. The back leg comes down from the hip and then goes to the left. The leg appears to go behind the body with the foot up from the back of the animal in the top centre of the image. Its back leg is being grasped by the next animal to the right. This animal also has one eye showing on its head. Down from the head is its front foot with three toes. The leg goes to the right. The rest of the animal is not shown. To the right an image shows a sword hilt and the very top part of the sword blade at the bottom of the image. Arrows points to the position of the hilt plates in the sword handle. The plates are shown edge-on by a bolder line.
Staffordshire hoard sword hilt plate (UEB contracted)
by RnibThis page shows an image of a hilt plate, detail of decoration, and a hilt. There is a locator dot shown, which will be at the top left of the page when the image is the correct way up. There is a face view of a hilt plate in the top of the page, a detail in an image border at the bottom of the page and a sword hilt in an image border in the bottom right of the page. The face view shows the plate to be slightly bent and some of the decoration is not shown as it is hidden by soil which has not yet been removed. At each end to the left and right is dashed line circle. These are the clasps to semi-precious stones which are missing. In the centre of the image is the hole where the blade would pass when the sword was being assembled. Around the hole there are intertwined animals. The detail shows the animals more clearly. On the left is the hind quarters of an animal. Its back leg is being grasped by the next animal which has one eye showing on its head. Its body curves down and then up again. Down from the head is the front foot with three toes. The leg goes to the right and then up. The back leg comes down from the hip and then goes to the left. The leg appears to go behind the body with the foot up from the back of the animal in the top centre of the image. Its back leg is being grasped by the next animal to the right. This animal also has one eye showing on its head. Down from the head is its front foot with three toes. The leg goes to the right. The rest of the animal is not shown. To the right an image shows a sword hilt and the very top part of the sword blade at the bottom of the image. Arrows points to the position of the hilt plates in the sword handle. The plates are shown edge-on by a bolder line.
Staffordshire hoard sword hilt plate (large print)
by RnibThis page shows an image of a hilt plate, detail of decoration, and a hilt. There is a locator dot shown, which will be at the top left of the page when the image is the correct way up. There is a face view of a hilt plate in the top of the page, a detail in an image border at the bottom of the page and a sword hilt in an image border in the bottom right of the page. The face view shows the plate to be slightly bent and some of the decoration is not shown as it is hidden by soil which has not yet been removed. At each end to the left and right is dashed line circle. These are the clasps to semi-precious stones which are missing. In the centre of the image is the hole where the blade would pass when the sword was being assembled. Around the hole there are intertwined animals. The detail shows the animals more clearly. On the left is the hind quarters of an animal. Its back leg is being grasped by the next animal which has one eye showing on its head. Its body curves down and then up again. Down from the head is the front foot with three toes. The leg goes to the right and then up. The back leg comes down from the hip and then goes to the left. The leg appears to go behind the body with the foot up from the back of the animal in the top centre of the image. Its back leg is being grasped by the next animal to the right. This animal also has one eye showing on its head. Down from the head is its front foot with three toes. The leg goes to the right. The rest of the animal is not shown. To the right an image shows a sword hilt and the very top part of the sword blade at the bottom of the image. Arrows points to the position of the hilt plates in the sword handle. The plates are shown edge-on by a bolder line.
Staffordshire hoard sword hilt collar (UEB uncontracted)
by RnibThis page shows an image of a hilt collar and a hilt. There is a locator dot shown, which will be at the top left of the page when the image is the correct way up. There is a side view of a hilt collar in the top of the page and a sword hilt in an image border in the bottom of the page. The side view of a hilt collar shows decorations of garnet set in a ring of gold. There are three bands of decorations going horizontally across the image. The top band is made of two lines of shapes which interlock. The shapes in the top line are all very similar. The shapes in second line are also very similar to each other. The second middle band is much wider and is formed by several convoluted broken lines which interweave. The third band is like first band but mirrored so that the first line of shapes in the top band becomes the bottom line in the bottom band. The diagram at the bottom of the page shows a sword hilt and the very top part of the sword blade at the bottom of the image. An arrow points to the position of the collar in the sword handle. The collar is shown by a bolder line.

